E2Easy MCP
Give your AI agent a browser-testing workspace
Connect E2Easy through MCP and use a conversation to create, organize, run, and schedule browser tests. Your agent works with the same saved tests and run history that you see in E2Easy.
Remote MCP endpoint
https://mcp.e2easy.app/mcp Name it e2easy, complete OAuth when prompted, and then ask the agent to create or run a test.
What is E2Easy MCP?
Model Context Protocol (MCP) is a standard way for an AI client to use approved tools. Once you connect E2Easy, the agent can work with your authorized E2Easy account instead of merely suggesting test steps in chat.
You stay in control: use a precise prompt, ask the agent to show steps before saving, and use your normal E2Easy workspace to review recordings and results. The same endpoint works across MCP-capable clients; only the location of each client’s MCP settings differs.
Working in Cursor or Claude Code on a codebase? The @e2easy/plugin npm package scaffolds this MCP connection for you and adds a pre-commit gate that keeps recorded tests in sync with your UI changes.
What you can do through MCP
Create tests
Describe a browser flow in plain English and save it as a structured E2Easy test.
Manage tests
List tests, inspect steps, update a flow after a product change, or remove an obsolete test.
Run remotely
Ask the agent to launch a saved test through E2Easy server runners instead of replaying it locally.
Schedule coverage
Set a recurring schedule for a stable saved test and keep routine regression checks running.
Review evidence
Inspect run status and history; use available run details and video evidence to investigate a failure.
Use real pages
Create tests against the page, labels, fields, and buttons that exist in your chosen environment.
Connect manually or by prompt
Option 1: add the endpoint yourself
- Open your AI client’s MCP, Connectors, or Tools settings.
- Add a remote server named e2easy.
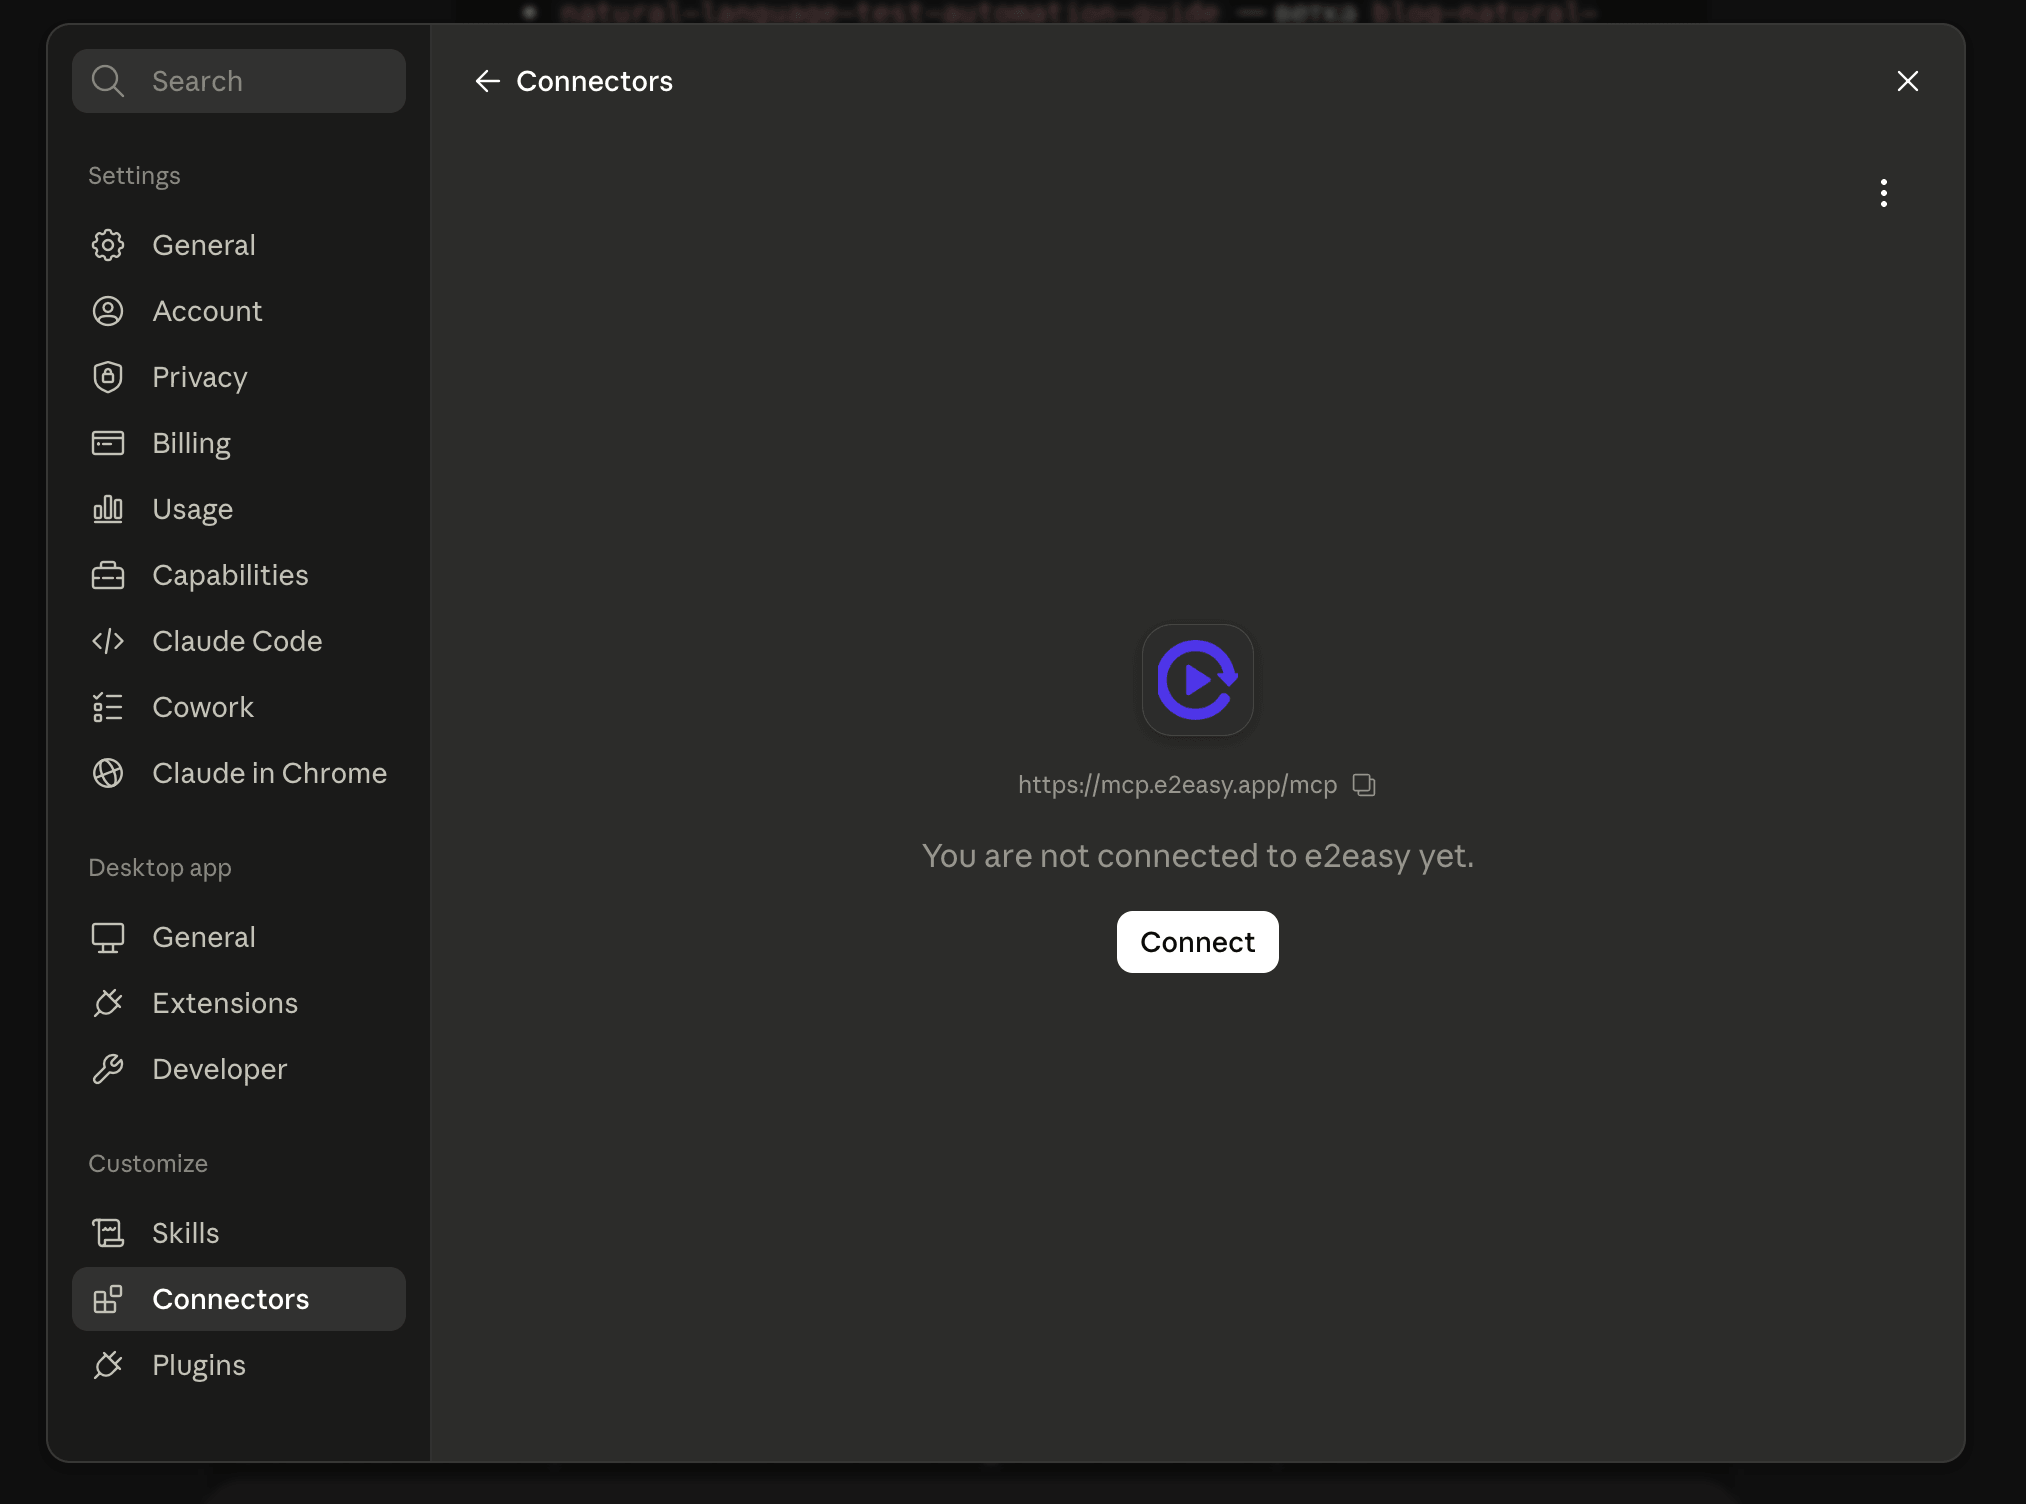
- Paste the endpoint, save it, and select Connect.
- Complete the E2Easy OAuth sign-in window.
Option 2: ask an agent to add it
In clients that let an agent manage MCP configuration, paste this request. Review the proposed configuration before it is saved.
Add the E2Easy remote MCP server named “e2easy” with the endpoint https://mcp.e2easy.app/mcp. Use the client’s standard OAuth connection flow, then confirm that the E2Easy tools are available. Create a recording and run it remotely
- 01
Describe the outcome
Name the URL, user state, actions, and an observable result.
- 02
Review and save
Ask the agent to show the steps, then save the recording to your project.
- 03
Run remotely
Request a server-runner execution for the saved test.
- 04
Inspect the result
Read the status and run history; review available details before changing a test.
Use E2Easy to create a test for https://staging.example.com. Open the sign-in page, enter the QA account, click Sign in, verify the Dashboard heading, save the test as “Staging sign-in”, then run it remotely and report the result. Prompt library
Start with a small, high-value flow. State what must be true at the end of the test, and ask for review before any destructive update.
Create and record a test
Create an E2Easy test for https://staging.example.com/sign-in. Sign in with the QA credential, verify the Dashboard heading is visible, save it as “Staging sign-in”, and show me the recorded steps before running it. Inspect and improve a test
List my E2Easy tests. Open the steps for “Staging sign-in”, identify any fragile or unnecessary steps, and propose the smallest update. Do not save changes until I approve. Run a test remotely
Run the E2Easy test named “Staging sign-in” remotely. Report the result, failing step if any, and the available run-history details. Schedule a regression check
Schedule the E2Easy test “Checkout smoke test” to run every weekday at 09:00 Europe/Kyiv. Confirm the schedule and keep the existing test steps unchanged. Update a changed flow
The “Checkout smoke test” now has a new delivery-method screen after the address form. Inspect the existing test, update only the affected steps, and show me the final step list for approval. Investigate a failure
Show the latest failed run for “Checkout smoke test”. Summarize the failing step and evidence, then suggest a safe correction without changing the test yet. Claude
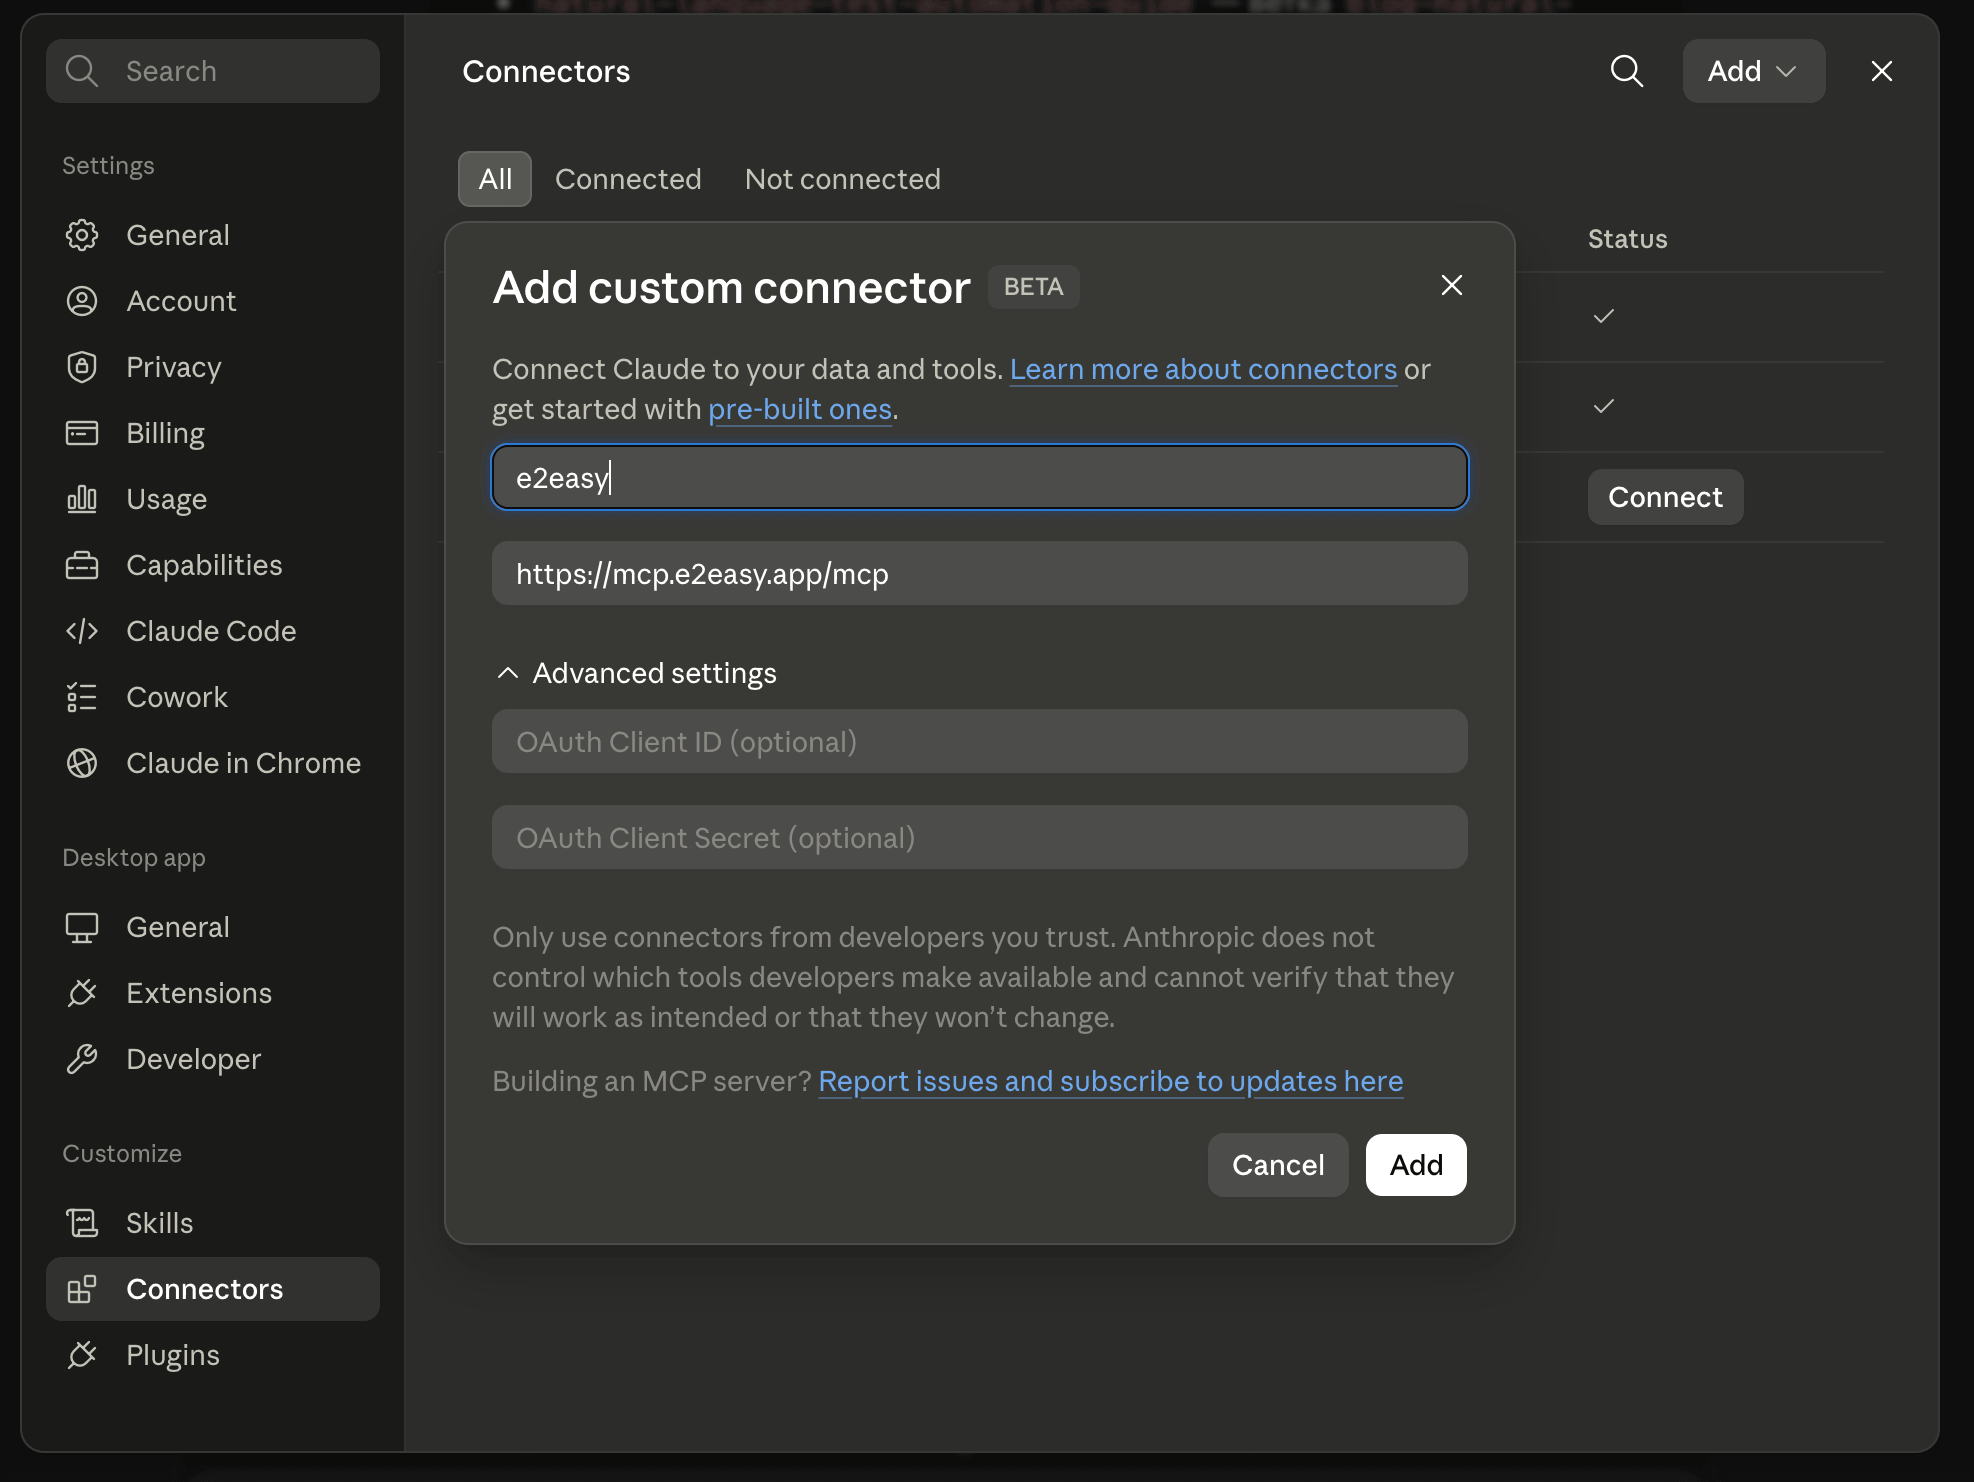
Open Customize → Connectors, choose Add custom connector, enter e2easy and the endpoint, then choose Connect and complete OAuth.
Prompt setup
Add the E2Easy remote MCP server named “e2easy” with the endpoint https://mcp.e2easy.app/mcp. Use the client’s standard OAuth connection flow, then confirm that the E2Easy tools are available. First test
Use E2Easy to create a test for https://staging.example.com. Open the sign-in page, enter the QA account, click Sign in, verify the Dashboard heading, save the test as “Staging sign-in”, then run it remotely and report the result. Cursor
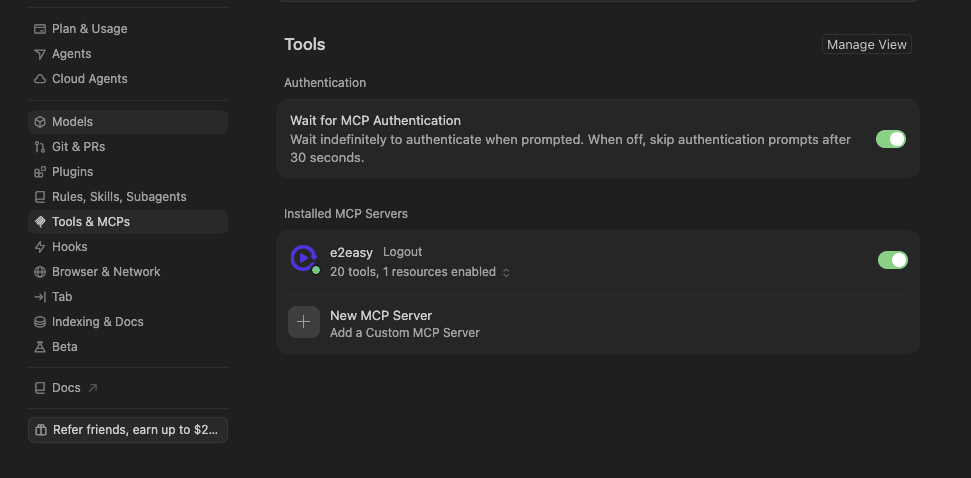
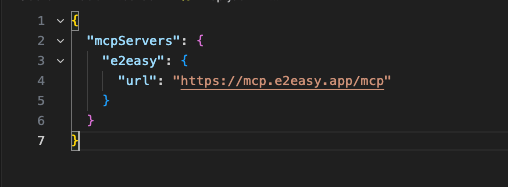
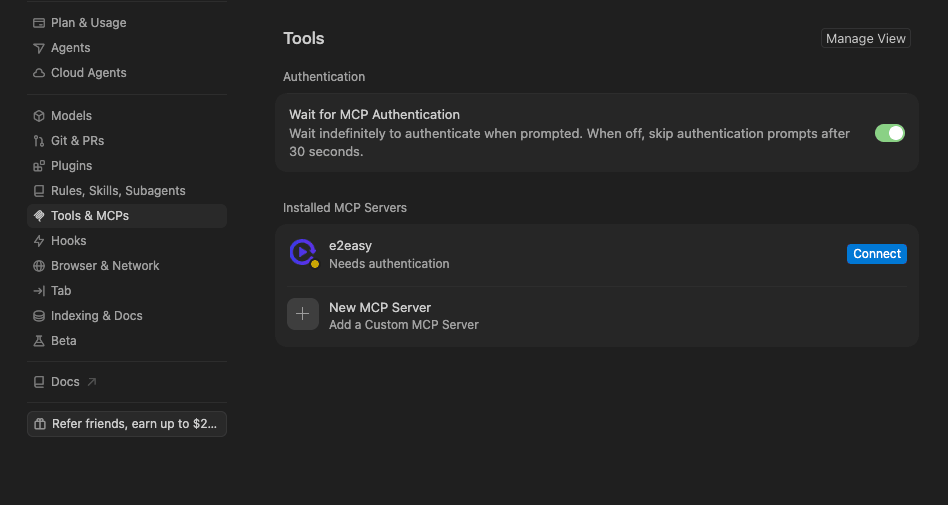
Open Cursor settings, go to Tools & MCPs, add a custom MCP server, then connect the e2easy server and finish the authentication flow.
Add the E2Easy remote MCP server named “e2easy” with the endpoint https://mcp.e2easy.app/mcp. Use the client’s standard OAuth connection flow, then confirm that the E2Easy tools are available. Codex
Add E2Easy as a remote MCP server in Codex settings or ask Codex to add the endpoint to its MCP configuration. Complete OAuth in the browser when requested, then use the prompt library above.
codex mcp add e2easy --url https://mcp.e2easy.app/mcp Use E2Easy to create a test for https://staging.example.com. Open the sign-in page, enter the QA account, click Sign in, verify the Dashboard heading, save the test as “Staging sign-in”, then run it remotely and report the result. ChatGPT
In a ChatGPT workspace that supports custom MCP connections, add E2Easy from the connectors or tools settings, provide the endpoint, and authorize the connection. The agent can then use the same workflow to create or run an E2Easy test.
Add the E2Easy remote MCP server named “e2easy” with the endpoint https://mcp.e2easy.app/mcp. Use the client’s standard OAuth connection flow, then confirm that the E2Easy tools are available. Antigravity
Open the project’s MCP server configuration, add the E2Easy remote endpoint, and complete OAuth when Antigravity opens the authorization page. If the product supports configuration by agent, use the prompt below and review the proposed change first.
Add the E2Easy remote MCP server named “e2easy” with the endpoint https://mcp.e2easy.app/mcp. Use the client’s standard OAuth connection flow, then confirm that the E2Easy tools are available. Copilot
In a Copilot environment with MCP support, add the E2Easy server from the available tools or project MCP configuration, use the endpoint below, and authorize it with your E2Easy account before asking Copilot to create or run a test.
Add the E2Easy remote MCP server named “e2easy” with the endpoint https://mcp.e2easy.app/mcp. Use the client’s standard OAuth connection flow, then confirm that the E2Easy tools are available. Ready to connect your agent?
Create an E2Easy project, connect the MCP endpoint, and start with one reviewable test for a critical browser flow.